Completing a Decision task
In brief
When completing a Decision task, you'll be presented with at least two possible decisions. You'll have to make a choice of one of them. Decisions can also be made through voting, where multiple assignees cast their vote on a decision. Dependent on the task configuration, it may require a unanimous vote or a simple majority.
Required permissions
Can view their own tasks
Choosing a decision#
To make your decision, please navigate to Tasks. Once there, please find the task you wish to comment on. Note, you can make decisions from both the 'List view' and the 'Table view'.
Alternatively, if you've clicked the link in your task assignment email, you should be taken directly to the task.
List view#
Once you've loaded the task, you should clearly see the available decisions as blue buttons in the 'Actions' panel.
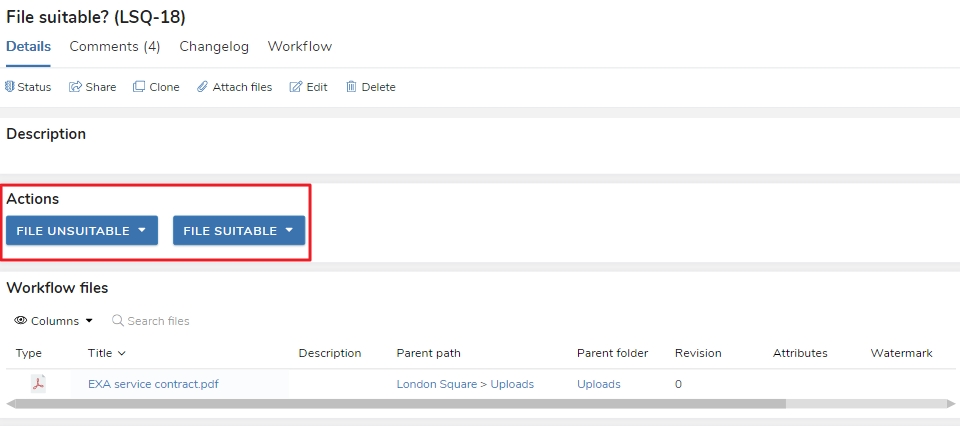
As the above task is in a workflow, you'll also see the 'Workflow files' table which lists the files that are currently in this workflow. If you click the filename in the 'Title' column, you're able to preview and download the file, which may help you when making your decision.
Once you're happy with the decision you want to make, click the relevant blue button. This will bring up a new menu with two options.
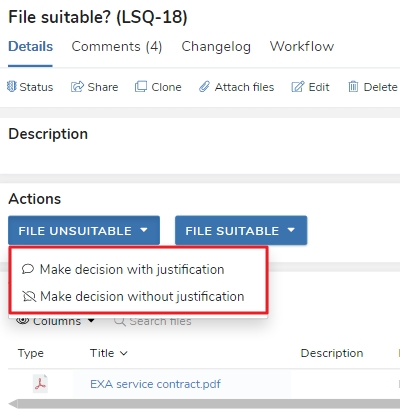
'Make decision without justification' will simply make the decision with no further input required from you. This is useful when you do not wish to leave a comment - for example, you're happy with the file and have nothing further to add.
On the other hand, selecting 'Make decision without justification' will open a new window with some further options.
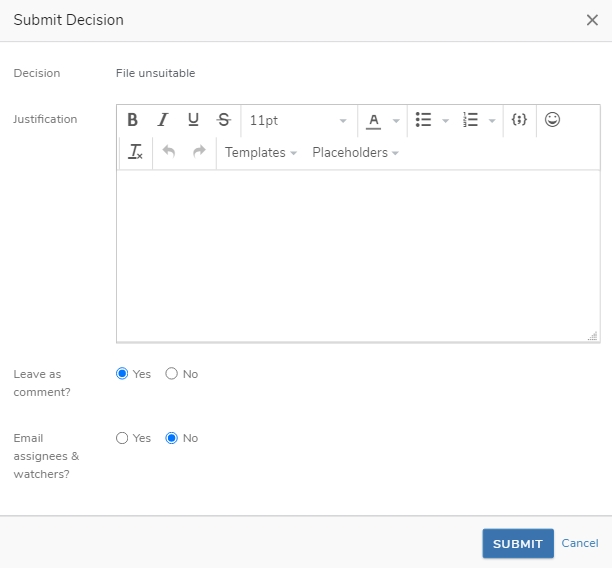
The 'Justification' textbox is where you can leave your reasoning behind your decision. This will be added to the task's changelog and, if 'Leave as comment' is selected, it will also be left as a comment on the task. If set to 'Yes', 'Email assignees & watchers' will ensure your decision and its reasoning is sent as an email to all assignees and watchers of the task. Generally speaking, it's best to leave 'Leave as comment' and 'Email assignees & watchers' as their defaults of 'Yes' and 'No' respectively.
When you've added your justification, click 'Submit'. This will make your decision and mark the task complete. You'll notice the task will update with your decision being visible in the 'Completed info' panel.
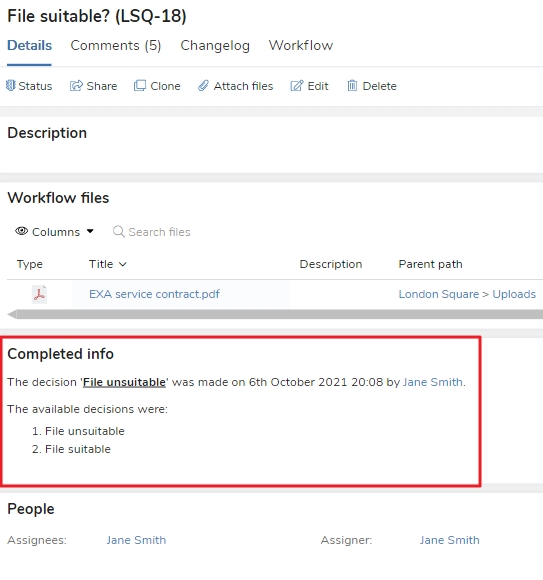
Table view#
If you click the Decision task's name in the 'Title' column, or right click anywhere on the table row, you'll see a menu in which the first option is 'Make decision'. If you hover over that option, you'll see the available decisions. Note that if you wish to add justification to your decision and leave a comment, you should select the bottom option, 'Make decision with justification'. The process will then be the same as described above.
Multi make decision#
Within the Tasks 'Table view', you'll notice that Decision tasks that are part of workflows have a checkbox beside them. If you check a checkbox, the checkboxes of other Decision tasks from other workflows will be hidden. I.e. only Decision tasks from the same workflow will be available.
If you then check all of the desired task checkboxes, and click a task or right click the row, you have the option to 'Multi make decision'. If you click that, you can then quickly and easily make the same decision for multiple tasks at once, saving you considerable time.
Voting#
In some situations, you may have been assigned a decision task with voting enabled. The approach to completing a voting Decision task is the exact same as a regular Decision task described above - the only difference is that the task will not be marked complete until all votes have been cast (or a voting end date has been configured).
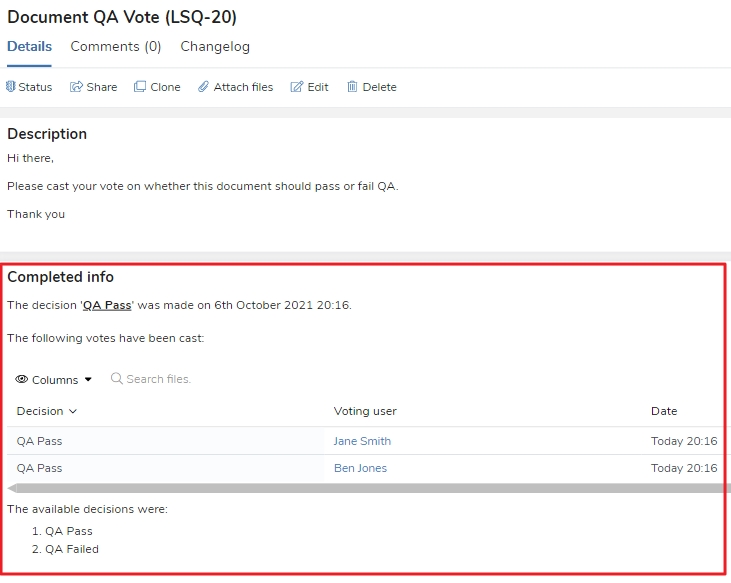
You'll notice that when you make your decision, the 'Completed info' panel contains a tabularised log of who voted for what decision.
Workflow tab & workflow overview#
As with other task types, you can make your decision from the 'Workflow tab' and the 'Workflow overview' window by clicking the relevant decision in the 'Current actions' panel. Notably, this means you can make all your decisions from the Project Files page - you don't need to be on the Tasks page.
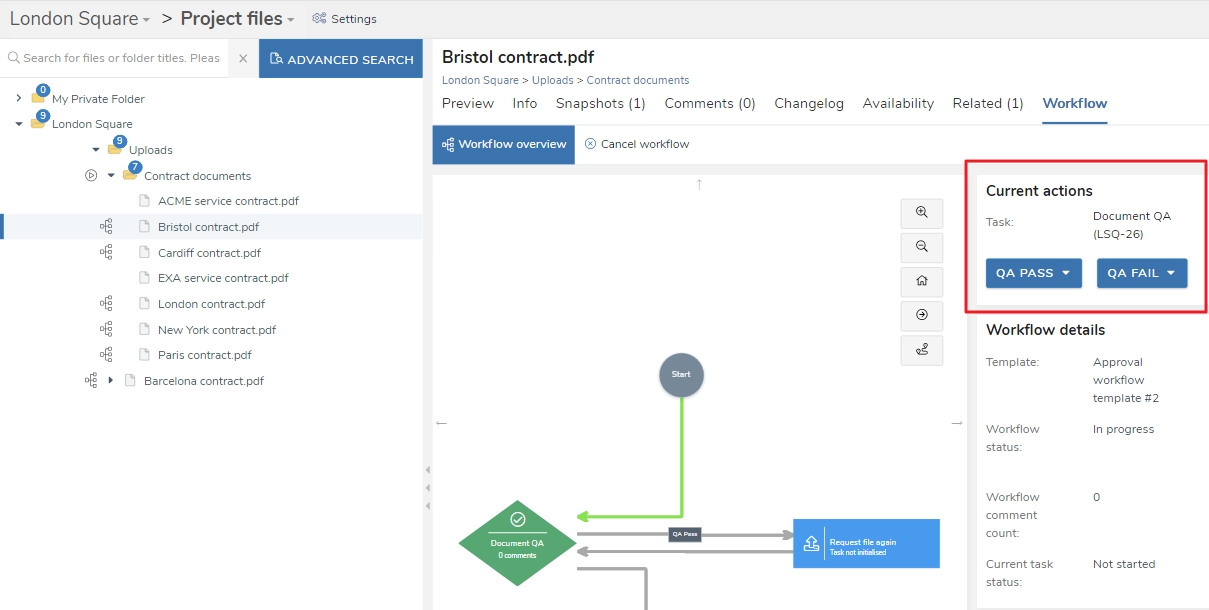
See this guide for more information about using the 'Workflow tab' and the 'Workflow overview' window.
Preview window#
Lastly, you can also make decisions from the file 'Preview' window. This means that, if you're using the preview to inform your decision concerning a file, you don't need to close the 'Preview' and then make the decision via the task. Instead, you can make the decision there and then.